You have nurtured your plants with love and it’s sad for you to see them wilting when you are back rom
vacation. We know you are a responsible plant parent. But, you can enjoy your vacation without worrying about your plant babies, even in the summers.
Indoor Plants don’t need direct sunlight but they can’t compromise on water, except succulents. So, here are 5 scientific methods to water indoor plants when you’re away from home. These methods are really simple to install. Also, you hardly have to spend a few pennies, plus most of the required materials are available at home. So, let’s check them out.
${tocify}
The Mini Greenhouse
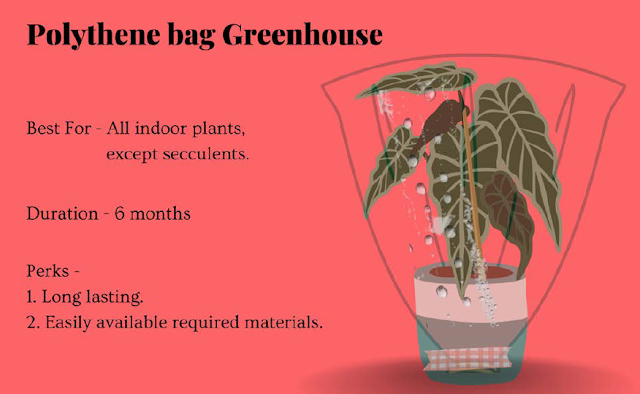
Greenhouses are used to cultivate crops under controlled conditions. You can also create a mini-greenhouse with a plastic bag to control the moisture of your soil.
Required materials
• A large and clear plastic bag
• 3-4 wooden stakes
• A rope or sellotape
Feeling happy that all the materials are easily available? Well, the other good news is, this hack will maintain the soil moisture for months. You can literally enjoy your world tour without worrying about your plants.
To build this mini greenhouse follow the procedure given below.
Procedure
Step 1. Water your plants optimally. Be careful overwatering is a big NO for this time.
Step 2. Insert some wooden stakes into the soil. Try to place it at the peripheries, so that the roots of the plant don’t get hurt.
Step 3. Now take a clear plastic bag, large enough to fully cover your plant. Blow some air into the bag to prevent it from collapsing. Cover your plant carefully. It is advisable that the plastic shouldn’t touch the leaves, try your best to follow this. But don’t stress much if it’s too hard for you, a little touch will cause no harm.
Step 4. Tie the plastic with a rope to fix it with the planter. You can also use sellotape for the same. Your mini greenhouse is ready.
How it works?
Let’s understand the science behind it.
As you water your plant optimally, some portion of water will be absorbed by the roots and excess will
try to evaporate. But don’t worry, you have created a mini atmosphere through the polythene and all the water vapour will be captured into this. Water droplets can be observed on the plastic firm. Once this mini atmosphere gets saturated with water vapour, vapour will convert into water (condensation) and drip down to the soil. This way water will keep reusing and moisture will be under control.
Hope the concept is clear to you now. Let’s explore the other methods of watering.
Glass Bottle Watering
Do you have glass bottles at your home? It could be empty ketchup, oil or wine bottles. If yes, then instead of throwing them away you can make a self-watering system for plants through these glass bottles. In case you don’t have any, don’t be disappointed. Hack No. 5 is the alternate option for you.
Required materials and tools
• Empty narrow neck glass bottles with cap (aluminium/plastic)
• (Nail + Hammer) Or ( Incense stick + matchbox)
• Small piece of cotton cloth
• Scissor
• Rubber band
One time installation of this system will save your time and effort in watering plants. The installation process is very simple, just follow the procedure given below.
Procedure
Step 1. Give lots of water to your plant. The soil needs to be wet enough, otherwise, it soaks all the water from the bottle within a day.
Step 2. Choose a narrow neck glass bottle. Take the cap of your bottle. If you have a plastic cap, then you need an incense stick and matchstick. Lit the incense stick and shake it a little to extinguish the flame. Place the ignited part of the incense stick at the centre of the cap, until it forms a hole.
For the aluminium lid, you need a hammer and nail. Keep the bottle cap upside down. Place the nail at
the centre of the cap and hammer to form a hole.
Step 3. Fill the bottle with water.
Step 4. The soil might choke the bottle at its opening and fail your self-watering system. To prevent this, cut a small piece of cotton cloth. Tightly fix it, at the mouth of the bottle, with the help of a rubber band.
Step 5. Hold the bottle and place your thumb at the hole. Turn the bottle upside down and place it in your planter. Insert the neck of the bottle deep into the soil and make sure the bottle is in a stable position.
You can observe the changing water level within a few hours. Your self-watering system is installed successfully. You must have understood how this works by the steps only. So, we don’t bore you with science. Let’s jump to the next method.
Water Wicking
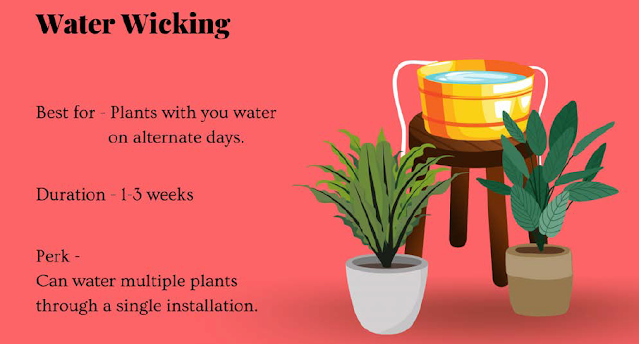
If you have multiple plants, then water wicking is the best for you. It will keep your plants hydrated through a single installation. The duration of this system depends on the volume of the water reservoir and the number of plants you want to water.
Required materials
• Cotton rope or cotton shoelaces
• Bucket (Water reservoir)
• Nuts/bolts for weight
If you can’t purchase cotton rope or cotton shoelaces then you can use any old cotton t-shirt. Cut your t-shirts into strips according to the required size. Also if you don’t have nuts/bolts you can still go for this. Read the procedure and you will get the alternate way at step 3.
Procedure
Step 1. Take a large bucket and fill it with water. Place all your planters around the bucket.
Step 2. Cut out the cotton rope according to the required size. The size of the rope depends upon the distance between the bucket and plants.
Step 3. Tie up a nut/bolt to add weight at one end of the rope and soak the rope in the water. If you don’t have nuts/bolts then make 2-3 knots at the end of the rope to add weight.
Step 4. Insert the other end of the rope 2-3 inches deep into the soil.
Your plant is ready to take water through capillary action.
Confused about what capillary action is and how it is related to water wicking? Or how does this hack even work?
Read below to know the logic behind water wicking. The science behind water wicking Wick means absorbing water through capillary action. Capillary action is caused by many forces resulting in the spontaneous flow of liquid through a porous material or a narrow tube. This movement of water even works against gravity. The movement of water from roots to the leaves of plants is because of capillary action. We used the same concept in water wicking. Since cotton is a good absorber and porous material, water in the reservoir will be absorbed and transferred to the soil through capillary action.
Hope the concept is clear to you. Check out the next method.
Houseplants Bath
Do you know when you are away from home, your plants would enjoy a bath in your sink or bathtub. This way they will feel fresh for a week. But this bath suits well-drainage planters.
Required materials
• Towel
• Bathtub or sink
It’s better to choose a lightweight planter for this and make sure your sink is strong enough to hold the weight of your planter. Then follow the mentioned below.
Procedure
Step 1. Give sufficient water to your plant, precisely saturate the soil.
Step 2. Place a towel at the drainer of your sink or bathtub to choke water.
Step 3. Half fill your bathtub or sink with water.
Step 4. Place your planter above the towel very carefully, otherwise, you may get scratches on your sink/bathtub.
Your plant is ready to enjoy the bath. Since it’s a good drainage planter the soil will absorb water. The self-watering pots are available in the market, works similarly. Check out the last method.
Bottle Drip System
Drip irrigation is a widely accepted method when it comes to saving water. Here water drips slowly to the roots of plants and maintains the soil moisture. You can also install it at home. The drip irrigation kits are available in the market but you can create a D.I.Y drip irrigation system by reusing your plastic bottles.
Required materials
• Plastic bottle
• Incense stick
You have to select the size of the plastic bottle based on the water requirement of your plant and the number of days you are on vacation. Try to reuse any mineral water/fruit juice or cold drink bottle. After that, you just need to follow the steps mentioned below.
Procedure
Step 1. Lit an incense stick and shake it a little to extinguish the flame.
Step 2. Take the selected plastic bottle and poke the ignited part of the stick for a few seconds to make
2 holes into the bottom and 3-5 holes in the sides of the bottle.
Step 3. Dig a hole into the soil to insert the bottle up to its neck without hurting the roots.
Step 4. Place the bottle into the hole Make sure the punctured side of the bottle should face your plant.
Step 5. Fill the bottle with water, then tightly screw the bottle cap.
Your self made drip irrigation system is ready to
hydrate your plant.
Wrapping up!
Your indoor plants are beyond adding aesthetics to the interior. It fades your Monday blues and helps you in living green. In return, you have some responsibility towards them. You can make your responsibilities somewhat easier through the above 5 hacks. Choose any one of the methods according
to your plant’s water requirement, your vacation duration and your convenience.


